Monday 12 January 2015

Side yard almost done

Remember the slushy, muddy space down the side of our house? And how my husband and dad had to dig and re-dig to put in drainage? Arggg!

Anyways, it's now doing fine! The drainage survived the heavy rain and storms before Christmas and I even put in some plants along the retaining wall to pretty up the area.
 Next step- pebbles to go on top and cut the drains to correct height.

 These will eventually spread and fill in the garden space more thickly.

Love the colour!

Down the track, I'd like to put a merbau timber screen on the fence outside the bathroom window and hang a wall art for a nice outlook from the bathroom. But for now, it's a better sight than the weeds and mud that used to be there!

Decorating sneak peeks!

We've been in the house for about 3 months now and it's wonderful! It's been so much fun decorating and shopping! My overall theme/feel/look for our home is relaxed, coastal with natural colours, latte, white and texture.

There's still lots to do, but some rooms are getting there!

I am so happy with our new dining table! It looks great with the colour of the floor. It has a really lovely texture too. And the chairs are nice and casual. I bought the artworks while the house was being built and they give the space a nice pop of colour. We now have shutters on the windows since this was taken.

 Kitchen looking towards the family room and the garden room right at the back.


 I really love the family room! Everything in it is new, bought especially for this space. It's relaxing and so nice to look at from the kitchen area.


 In the garden room looking towards the kitchen and through to the bathroom.

 So happy with the kitchen! It has sooo much storage, the walk in pantry wraps around behind the fridge and is massive!


 Bathroom- we now have blinds and some plants outside the window.


We all enjoyed our first Christmas in our beautiful new home!


We now have blinds, shutters and curtains and some new bits and pieces so stay tuned for some more photos to come!

Retaining Wall and Deck- Part1

It's been a crazy few months, settling in, decorating different rooms, shopping, planning the landscaping and starting on the retaining wall and deck. So needless to say, I've been very slack updating the blog.


The side yard coming off the alfresco area has been an ongoing nightmare throughout the build up until now. A very long story cut short is... there's an easement down the entire left side of our block so the house was positioned closer the right side as you can't build over the easement. We figured we would have a nice big area of yard coming off the side of the alfresco area. But then when the cut and fill was done, the house was built up fairly high and a huge amount of fill was left around the side of the house which then suddenly sloped down to the easement-- effectively leaving us with a sloping side yard, not the level yard we'd imagined. Definitely not the best option for young kids.


We spent months (yes, months) trying to figure out how we could improve the side area and looking into various options (fill in the area, retain the upper area, excavate the dirt, extend the fence, etc) and trying to find out info from council, certifiers, landscapers, structural engineers, excavators. Talk about frustrating! Just about every person I spoke to said something different, didn't know if we could do what we wanted to do, or just didn't care and passed us on to someone else! To make it more complicated, there's an existing retaining wall and fence along the boundary which meant we couldn't extend the wall higher and couldn't build another wall too close to it.

The private certifier was so difficult to deal with. He refused to give us the final occupation certificate due to the unretained dirt over the easement and lack of steps off the alfresco and from the front patio. After ringing him several times, emailing, leaving messages for him to call me back I became so annoyed when I got no response! How were we meant to find out what we needed to do and what our options were unless he spoke to me? In the end, my husband rang and left him a not-very-nice voicemail and wouldn't you know it? He rang him straight back (still not me though)! Grrr! He basically said just slope the dirt down properly as a temporary measure to get the certificate and then do whatever we like. But that would mean a lot of money, time and effort only to have to redo it all again in the way we wanted for the long term.

Aren't you glad I told you the short version? Lol!


Excavation

Anyway, we finally decided to excavate and remove 3 truck loads of dirt from next to the alfresco and build a block retaining wall. Then there will be a 1.5m wide deck coming off the alfresco area (running the entire length of the alfresco) with steps going down to the lower level. The lower level will have a tall (eventually) hedge along the fence for privacy and to block out the terrible white roof next door (nearly blinds you in the afternoon sun) and a grass area with a cubby house down one end.

The lower level is now flat and a much better play area for the kids after excavation.

 5 pallets of blocks were delivered
Looking towards the front of the house

 Retaining wall complete and the framework for the decking is up. Looking towards the back yard.

 The alfresco will now be even bigger with the extra space from the deck


 View from the lower level.


The deck will wrap around the back of the house too.

The merbau deck will also wrap around to the back of the house off the garden room where we will have a courtyard/sitting area. We will have space for a bbq area with decorative screens and some lovely big pots. There will be a timber railing with stainless steel balustrade all around the deck because it sits up high from the lower level and hopefully some nice lighting in the steps.

It's going to be such a huge deck area, I just can't wait to see the finished product!

Inspiration shot:

This is the look we want to create at the back of the house off the garden room with decorative screens, pots and bench seating...a private little oasis to relax.

Saturday 25 October 2014

Digging x3, drainage and flooding

Through out the build, the narrow side yard of the house (right hand side of the block when looking at the front of the house) has been soaking wet and muddy. Every time it rained, the whole area would be a muddy river.
So two weekends ago my husband and dad decided they'd better put in some drainage so that we could then start doing other work in the yard.

They thought it wouldn't take too long, just to dig down the side of the house, across the back and then put in a stormwater pipe and join it the the stormwater drain.

Of course, every time we say something won't take too long, you know it always ends up being a drama of some sort and doesn't go to plan...

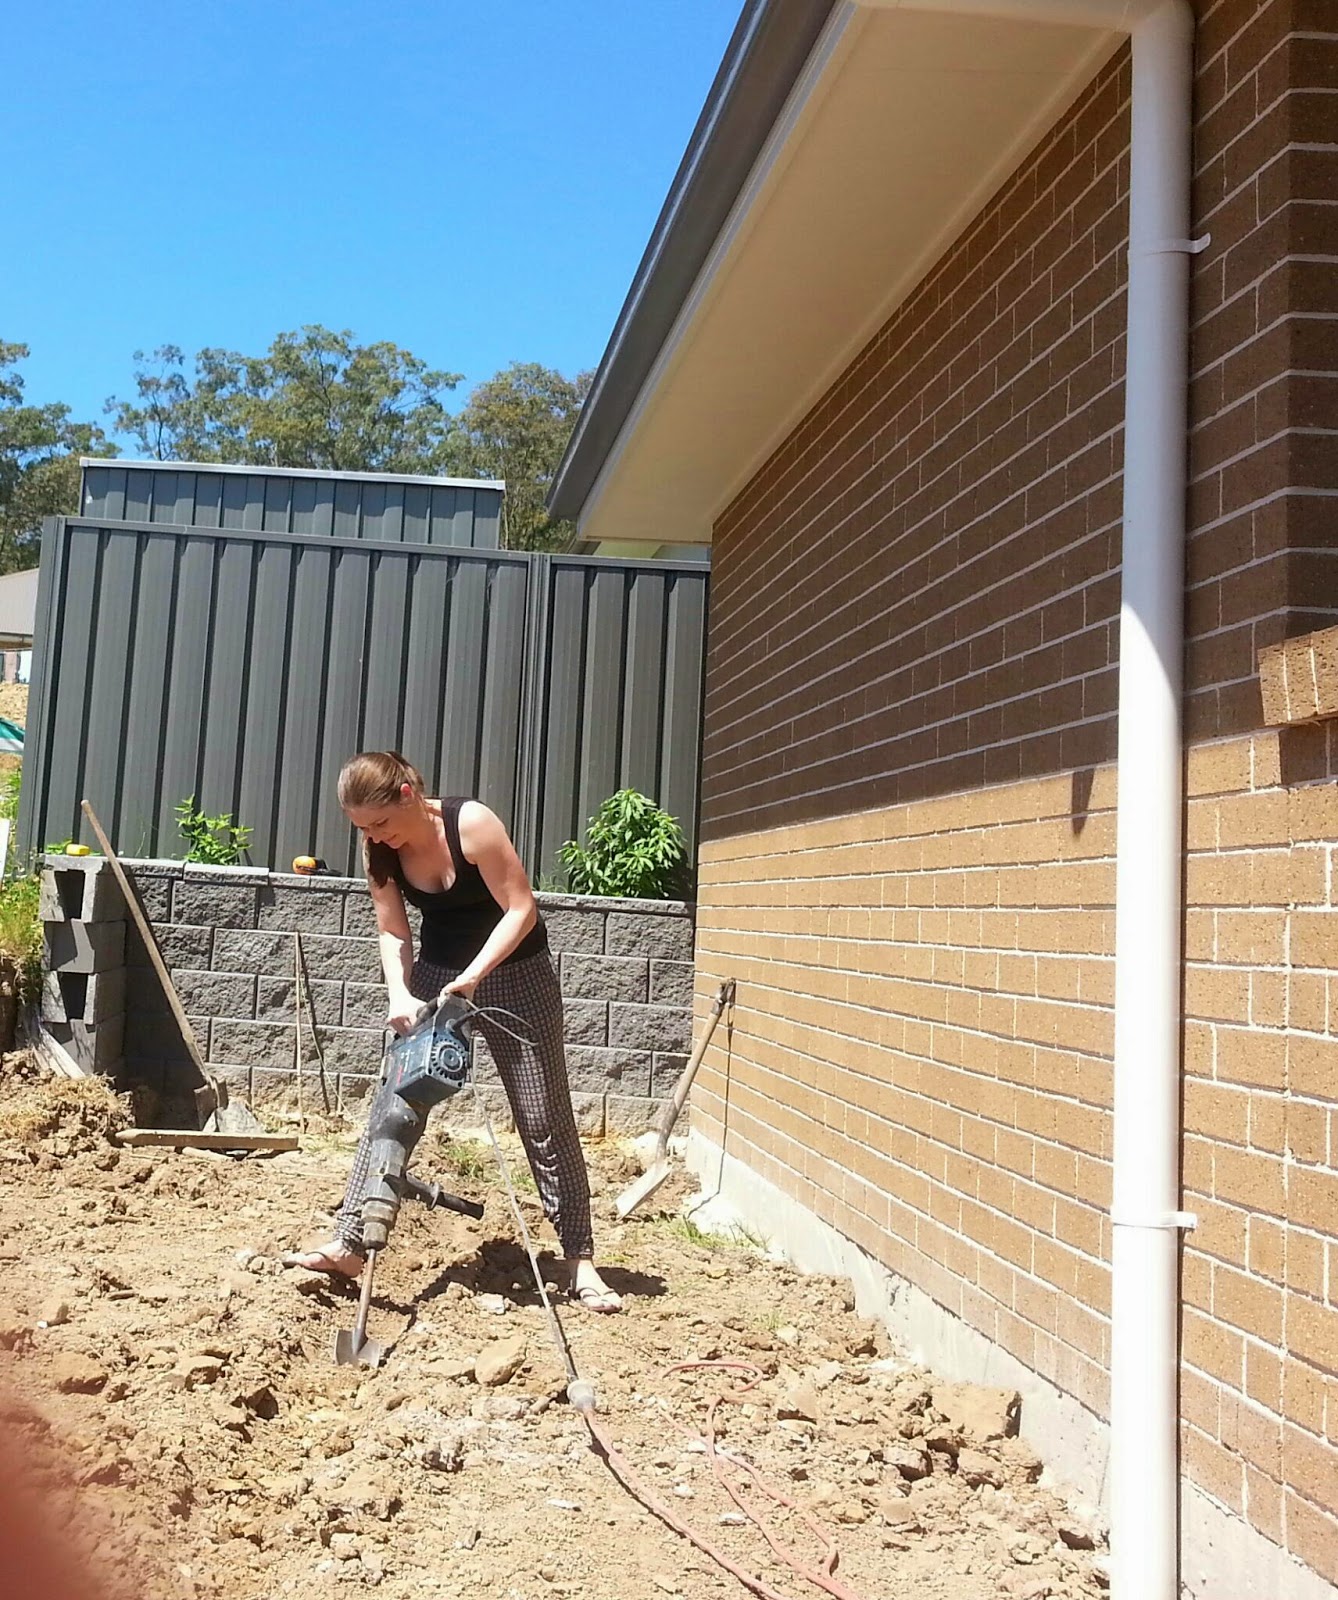
Diggin' #1. The dirt was ridiculously hard! I'm talking rock and clay. It ended up taking a whole day just to dig it up, even with my parents and us out there on the shovels and using the kanga (which was fun actually!)
Plus it was the only boiling hot weekend we've had in the whole of Spring!

the kids helping dig across the backyard

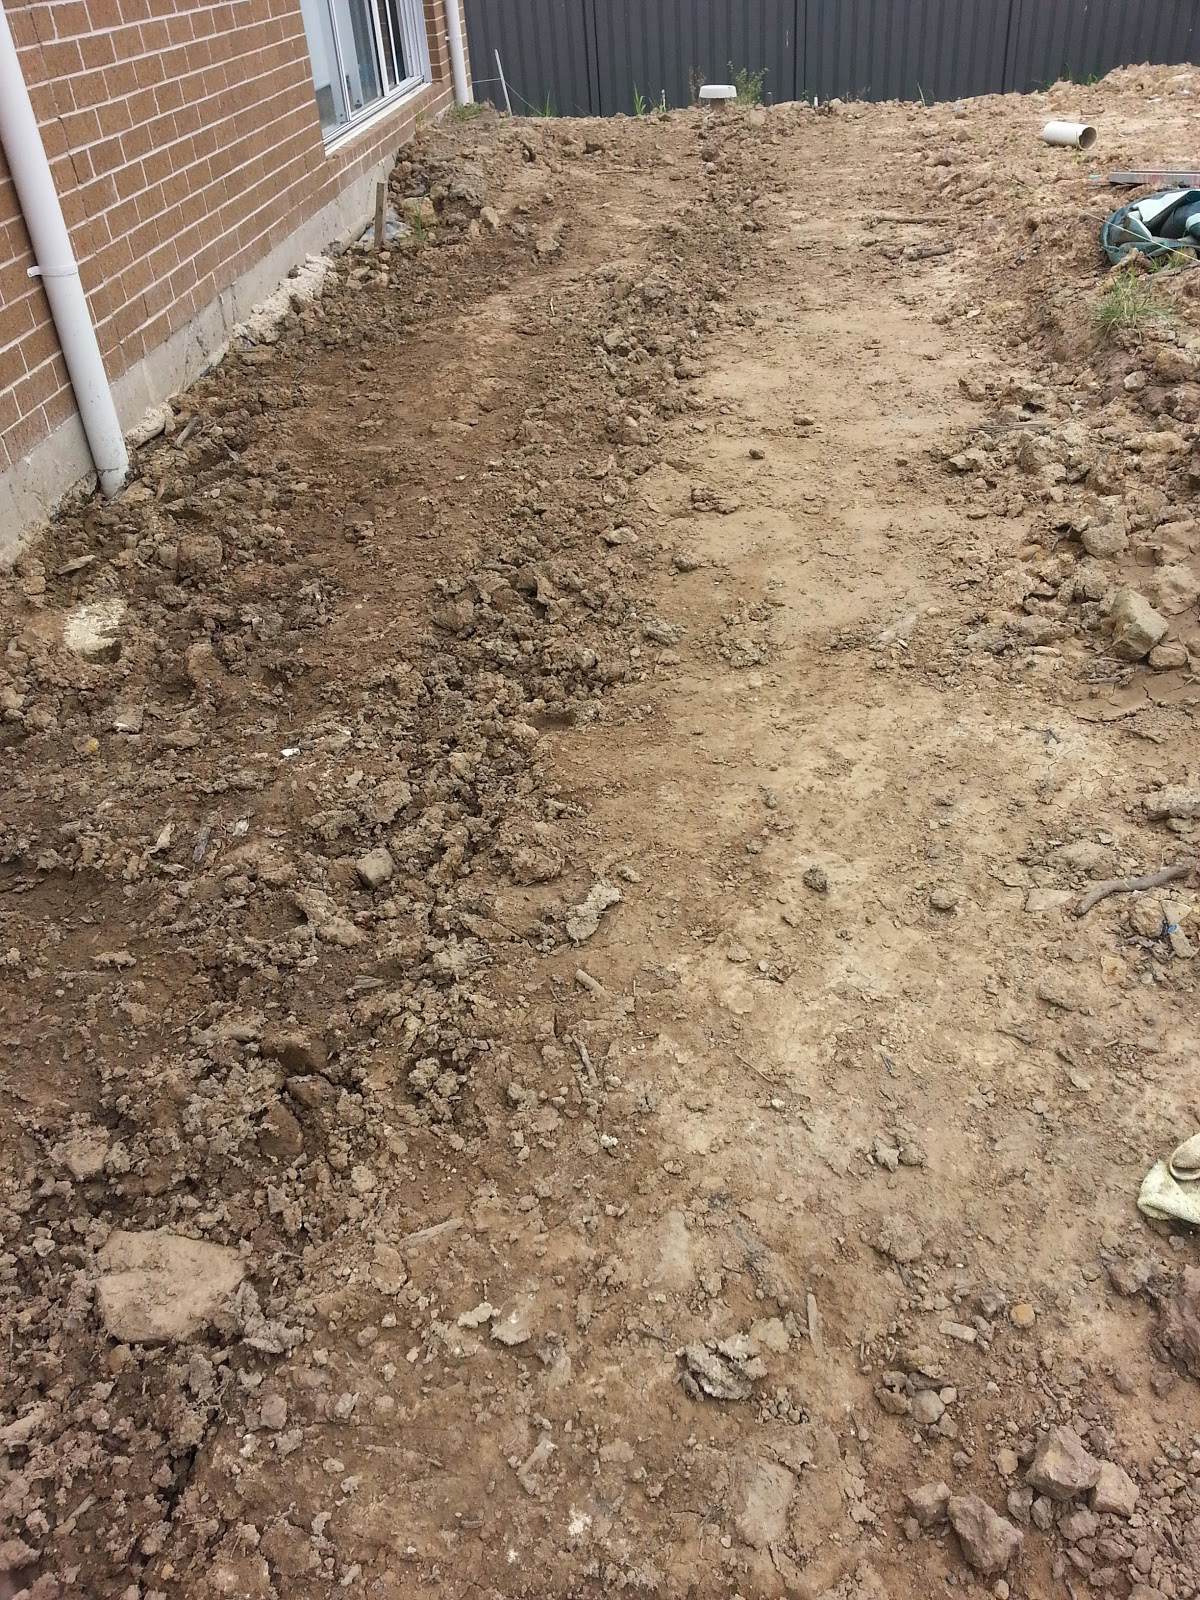
side yard looking towards the street

side yard looking towards the backyard

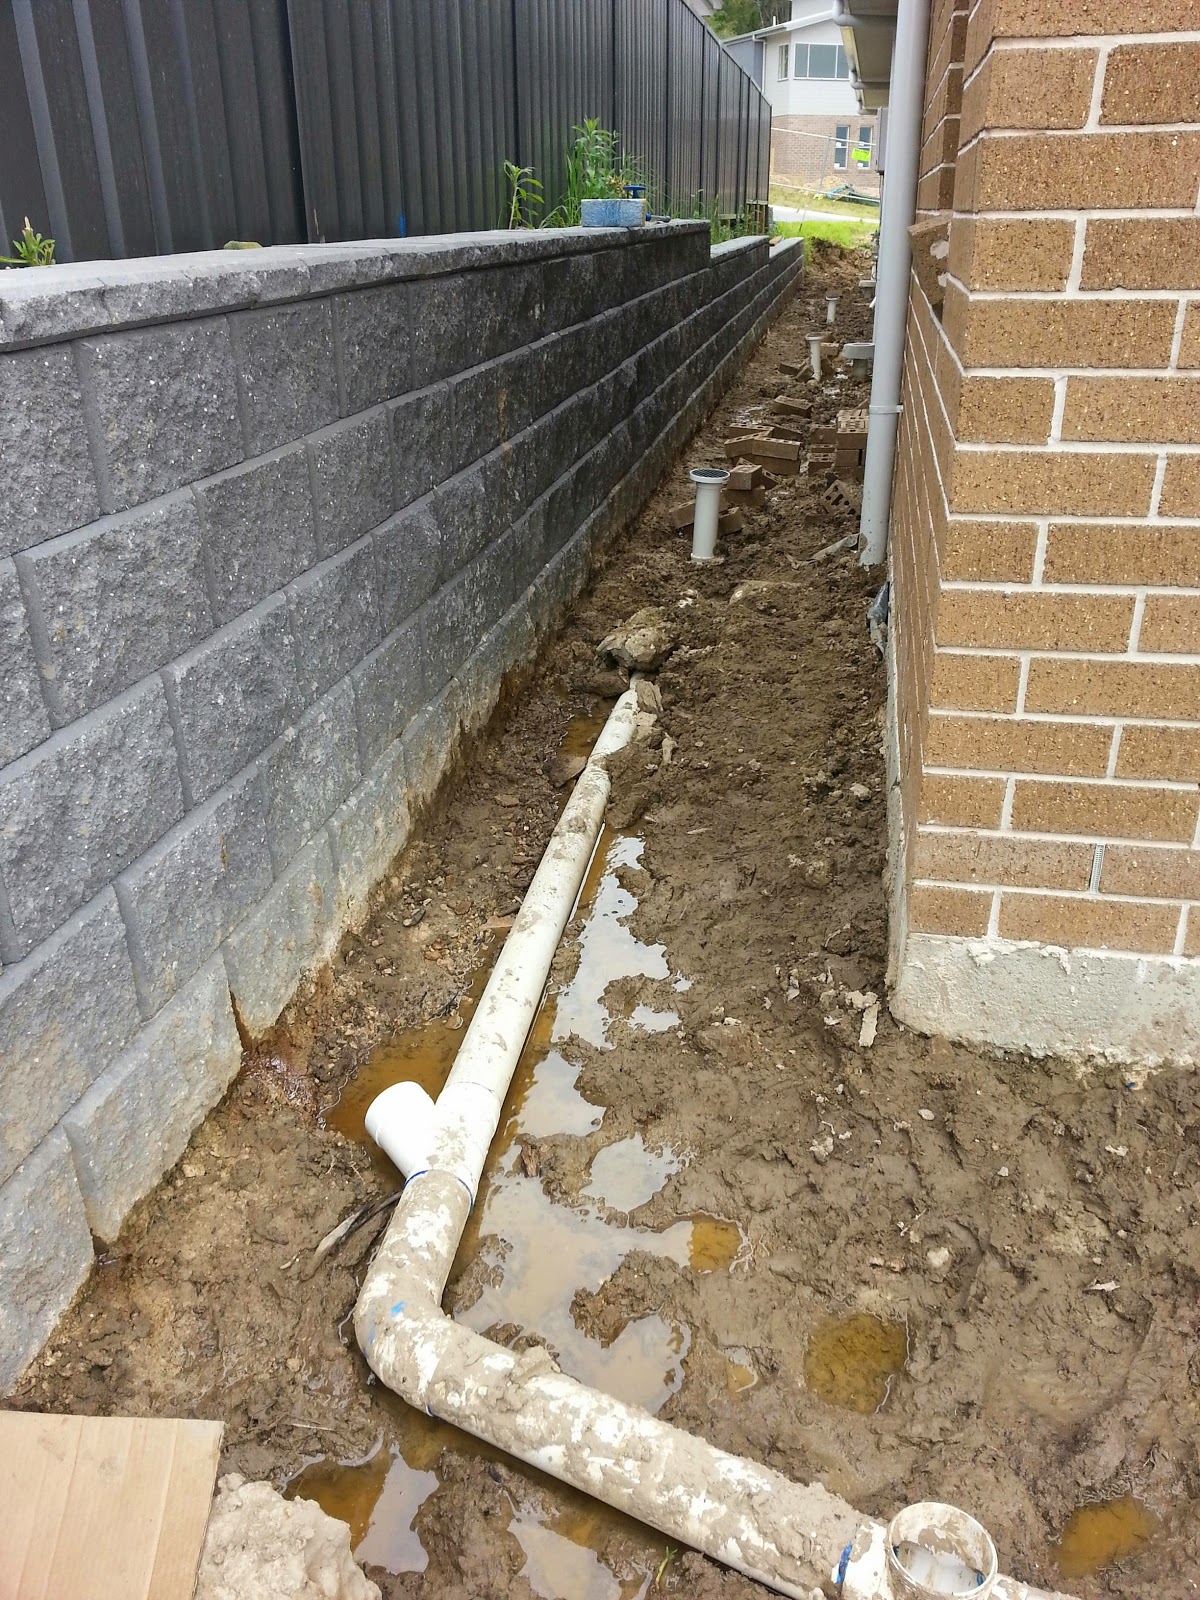
It took hours to get the slope right so that water would flow from the front right side of the house to the back left corner. Anyway the next day they put in the pipes and began covering the top with dirt but didn't get it finished.

That Monday night was when the huge storms hit and we received heaps of heavy rain. Well what happened? Because of sooo much rain and not enough heavy dirt being put back on top of the pipes, they rose to the top of the mud! They were floating on top of the muddy river we had!!

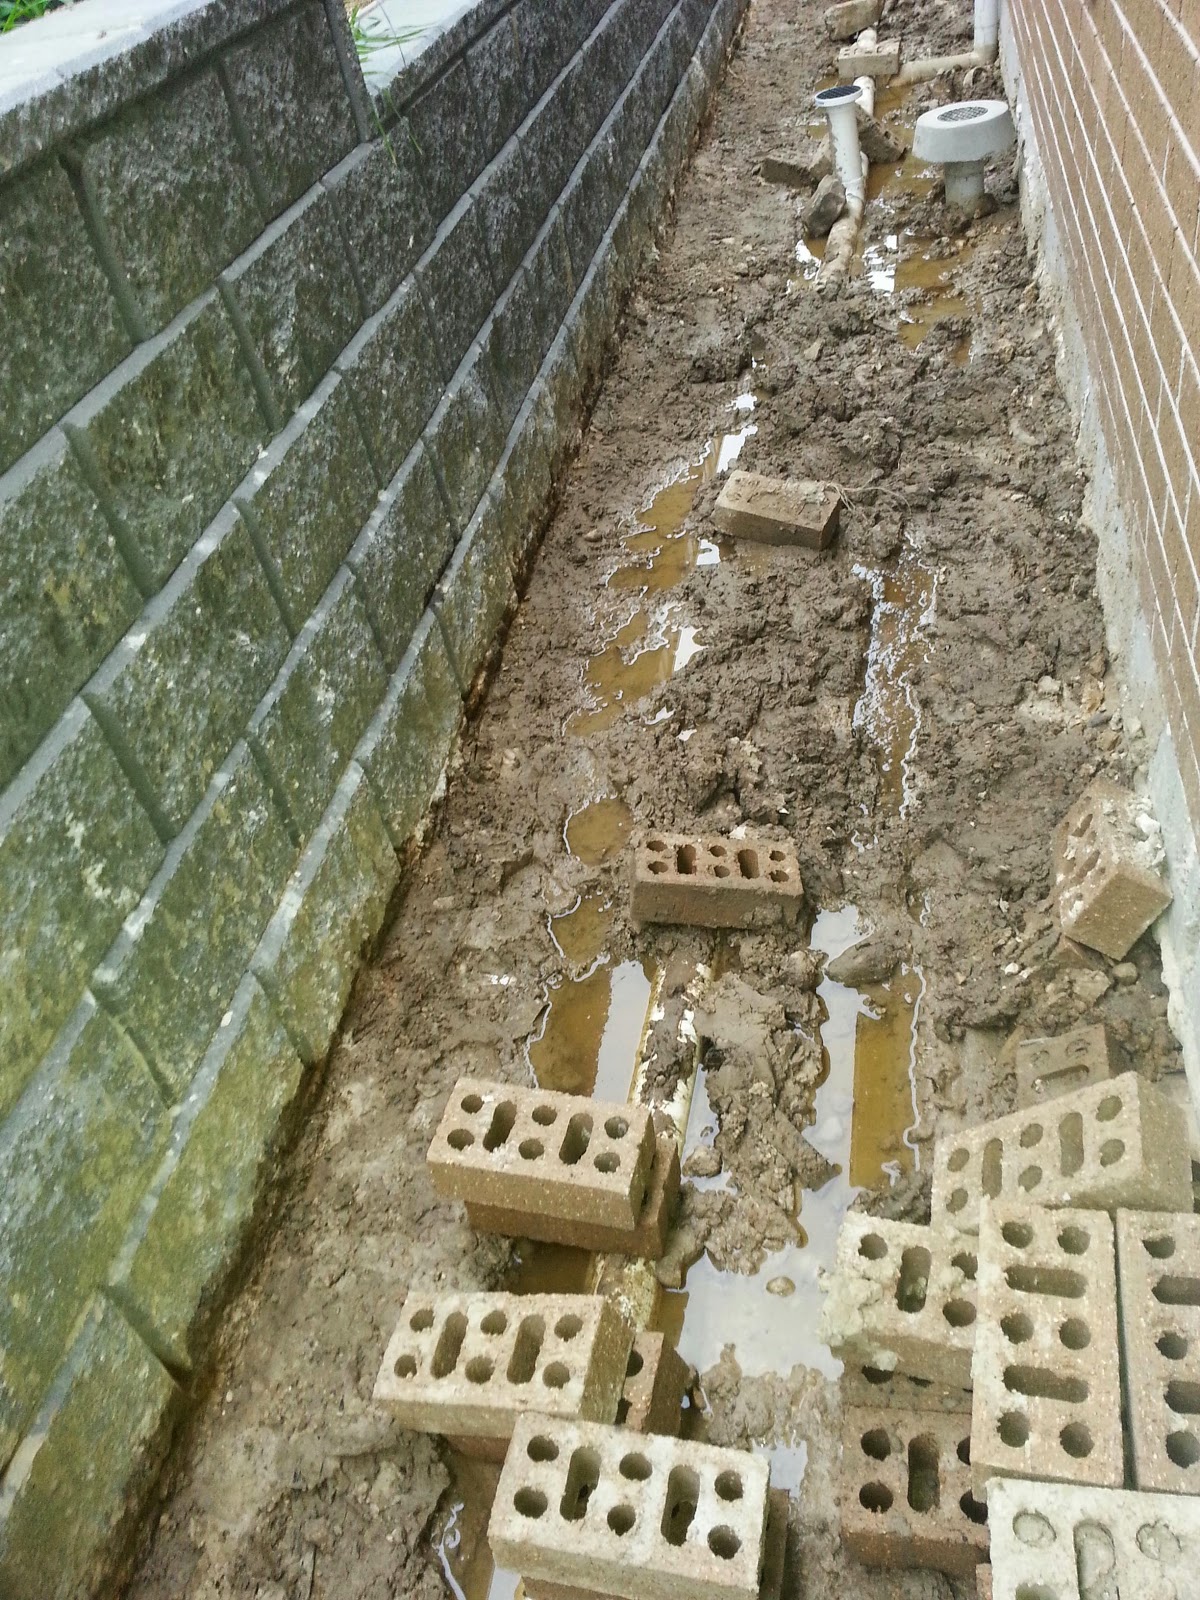
Diggin' #2. So the next weekend on Saturday they had to dig it all about again and this time put bricks and rocks on the pipes temporarily to keep them down in case of rain.
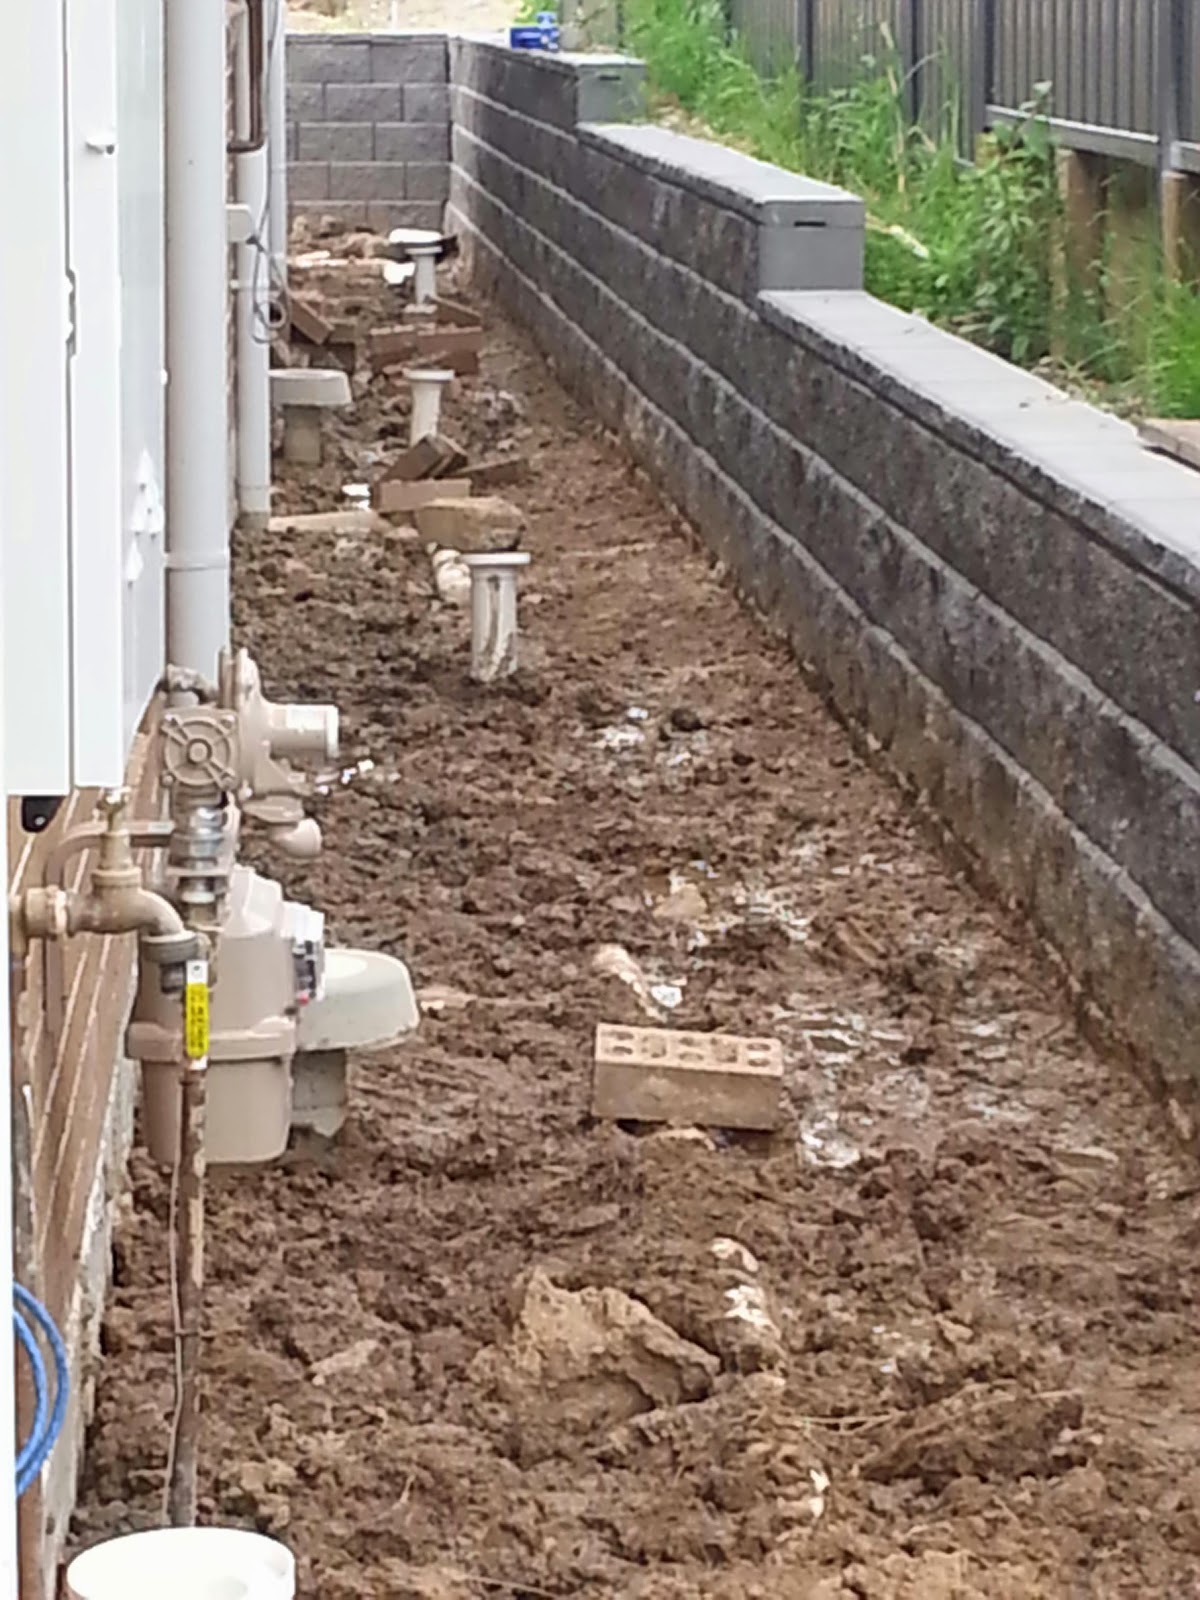
They also discovered that earlier in the year when we'd paid a landscaper to build our retaining wall before the house started, he had done a dodgy job with the drainage. I'd asked that he put in an ag pipe behind the wall, to drain away the water that runs down from next door, but we now know that he put in the tiniest (read:cheapest) pipe as possible and no black plastic behind the wall. So in essence, the pipe is useless and all the water seeps through the blocks of the wall. And that is why, we've figured out, the side yard has been so wet all this time.

Grrr! So frustrating considering that retaining wall cost us and arm and a leg! You'd think a 'professional' could be trusted to do the job properly. :(

So my dad realised that he'd have to run an ag pipe in the ground as well as the stormwater pipe  to drain away the water that seeps through the wall (hope you are all still following me! lol).

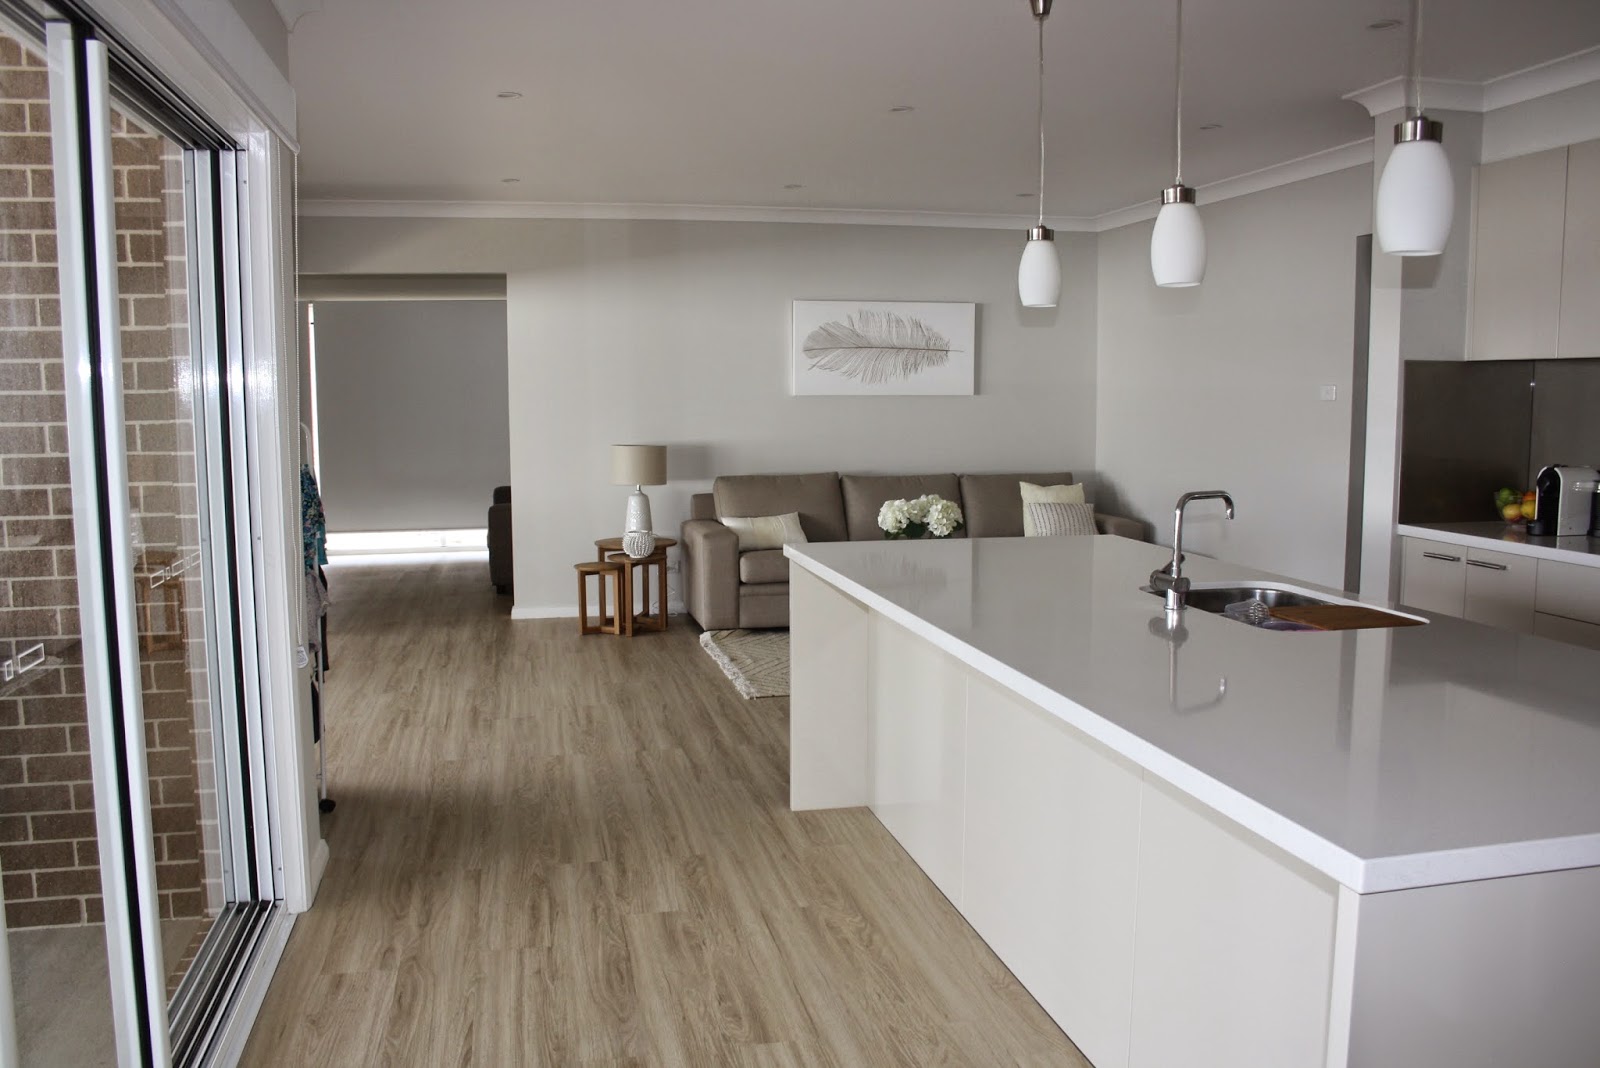
Diggin' #3. The next day, Sunday, my husband and dad were back doing what they needed to do again...diggin out the side yard again! If it hadn't been such hard work for them (mum and I had quit long ago by this stage and had resorted to decorating the house and doing odd jobs, lol) it could've almost been funny,... almost!

Anyway, so now the quick job that was meant to take a few hours will continue this weekend (yep, the 3rd weekend!) when they get some sand and gravel delivered.


I think I need some gumboots!


Me having a go digging with the kanga- lots of fun but hard work!


Monday 20 October 2014

Driveway

After weeks of trying to get driveway quotes and only ending up with a few, we went with one that was a little expensive but seemed to be good quality and workmanship (hopefully) and knew what he was talking about.

As our street is a dead end, there is not much parking so we decided to go for as large as possible so that two cars can fit next to each other and two behind.


the driveway area during the build

 formwork


the kids are so happy they can walk on the driveway now
 
The day the concrete was poured, a huge storm hit the area that night. There was thunder and heavy rain and wind but luckily the concrete seemed fine. We did however, end up with a large muddy swimming pool next to the driveway, just in front of the patio.
 
A week after it was poured, the concretor took the formwork away and we could drive on it- yay!!
 
 
Then in a month or so it will be sprayed a charcoal colour. Looking forward to seeing it finished!


Friday 3 October 2014

We've moved in!

After about a week of doing the floors my parents and I were completely exhausted! Our knees were all sore and our muscles aching! There was dirt and dust everywhere and so many off cuts of flooring, boxes and tools. It felt like a construction site not a home yet.
Gradually, the floor was completed with just a few edges to finish off as well as inside the kids robes. It looks gorgeous, really love the colour and can't wait to see all of the furniture and accessories in the house.
My husband only took a couple of days off work to move everything so he hasn't been at the house much.

So last weekend we finished moving everything to the garage (it's chockers). Because the floor was still being done we only put the essentials inside to start with (it was like camping...I really hate camping lol). Throughout the week I set the girls rooms up with their new bedding and accessories and put some furniture together.

There was also a steady stream of tradies coming and going- we got a different bath spout, stacker doors were serviced to open smoothly, got a tv aeriel, and finally our kitchen end panel and overhead doors arrived (with no scratches this time). :)

 Scratched end panel removed

 Flooring cut to allow for new end panel

New end panel installed

This week I've bought a new coffee table and side table for the family room, got our new dining table and chairs and picked up our youngest daughter's new bed, mattress and bedside table. It's been exciting to unpack bits n pieces I've bought throughout the year, some things I forgot I'd even bought lol! It's been so so much fun choosing furniture and decor for the house, but hey, who doesn't love spending money haha. I've spent the last couple of months looking for the perfect outdoor dining set and outdoor lounge and I think I've found the one (just gotta convince hubby).

We gave away our old lounge and sold our old dining table and chairs which did us well but were looking a bit dated. I also cleaned the old house where we were renting which was a huge effort with two bored kids driving me insane!

So tired, dreaming of the day everything is done so I can just relax with a cocktail...

More pics to come soon :)


Friday 26 September 2014

The Easiest Floor Ever!

In my mind, we would whip the flooring down in record time and then we would be able to move in straight away. After all, the box says it's the easiest floor ever and that anyone can do it!


Haha haha haha haha! Don't mind my delusional crazy laugh because geez, was I wrong! Now, I'm not a 'handy' person at all and probably never will be (and either is my husband) but my dad's a builder and has laid timber floor, laminate, stick on vinyl planks and tiles heaps of times. We were told this click together, locking floor would be the easiest of all. The you tube video shows people just sliding and clicking the planks together easily.

From the start it wouldn't click together and every plank needed to be hammered in. It was taking hours just to do the front entry area :(

After 4 and a half days we had finished about half the house and were exhausted!! Maybe it was acclimatising to the house or maybe we were just getting better at doing it but it was a litle easier as we went. When we got to the kitchen we had to stop because we still hadn't had the end panel of the island bench replaced.

I eventually heard from the kitchen maker and apparently the end panel will be delivered on Thursday. I told him that it was holding us up and he said it may come a day earlier but it's unlikely. Grr, if only it had been ordered after PCI like it was supposed to and it would have been all done by now!

We had the garage door people come out to fix the tension of the door as it was not closing smoothly and the scratched oven handle was replaced. I've also organised a different bath spout to be installed as it is round as opposed to the square look of everything else in the bathroom.

Anyway, the floor looks great but is a pain to lay and we will need to move in and then finish it at a later time unfortunately.